How to Study a Jazz Standard on Piano — a 14-Step Guide
PIANO STUDY GUIDE · ALL LEVELS
A jazz standard isn’t simply a piece you “learn.” It’s a musical universe you explore — harmony, melody, rhythm, improvisation, and interpretation all coexisting in one tune. This guide gives you a structured, practical route so you don’t get lost in the process.
Follow the steps in order — or return to whichever you need. The plan works at every level, as long as you adjust the depth of each phase to your own experience. If you want the philosophy behind this method, Bill Evans laid it out in 1966: melody first, then harmony, then freedom.
Contents
- Choosing a Standard & Preparation
- Listening & Immersion
- Harmonic Analysis
- Analysing & Memorising the Melody
- Basic Accompaniment (Shell Voicings)
- Reversed: Melody in the Left, Chords in the Right
- Transposing to Another Key
- Rootless Voicings
- Reharmonising the Melody
- Improvisation: Preparation
- Building Phrases
- Transcription
- Comping & Interaction
- Full Performance
Choosing a Standard & Preparation
Before you touch the piano, you need the right material. Choosing the tune and preparing your sources is the foundation of everything that follows.
- Choose a standard appropriate to your level.
- Find a lead sheet with melody and chord symbols.
- Download a backing track — iReal Pro or YouTube.
Listening & Immersion
Before you play anything, you listen. This step shapes your internal representation of the tune and determines everything that follows.
- Listen to at least 5 recordings in different styles and tempi. Note what’s shared and what differs: melody, tempo, groove, reharmonization.
- Try to sing the melodic line — you don’t have to be a singer.
- Identify the bass line and the comping at whatever depth suits your level.
WHY THIS MATTERS
If the tune isn’t in your ear, every technical step that follows will feel empty. Almost every student who skips this stage ends up rebuilding it later — under harder conditions.
Harmonic Analysis
Mark up the lead sheet by hand and identify:
- The key of the tune, and whether/when it changes.
- II–V–I progressions (major and minor).
- Turnarounds, modulations, pedal points.
- For chords you don’t understand: write the degree and quality in terms of the key — e.g. an Eb dim in a C major tune is ♭III dim.
Analysing & Memorising the Melody
- Play the melody with the right hand only, at a slow tempo.
- Understand its relationship to the chords and the scale:
- Which notes are chord tones?
- Which are tensions (9, 11, 13)?
- Sing it and play it at the same time (sing & play).
This is the step where Bill Evans and Monk converge: melody first, always. If you can’t speak the melody alone, no amount of harmony will fix that later.
Basic Accompaniment — Shell Voicings
The first time the two hands cooperate. The left provides the harmony, the right holds the melody.
- Play shell voicings (root + 3rd or 7th) in the left hand.
- Play the melody in the right hand on top.
- Practise with a backing track or metronome.
Melody & Chords — Reversed
- Left hand: shell voicings.
- Right hand: chords / guide tones / block chords / voicings — depending on your level.
- Practise in a straight state to check the melody–harmony balance.
- If you can, bring the chords into closer positions.
Transposing to Another Key
Transposition strengthens your understanding of the harmony and frees you from the printed page.
- Transpose the tune (or part of it) to:
- C major (if it’s in another major key)
- A minor (if it’s in another minor key)
- Play melody + shell voicings in the new key.
Rootless Voicings
- Left hand: rootless 3-note voicings (3–7–9 or 7–9–13) or 4-note voicings (3-5-7-9 / 7-9-3-5).
- Right hand: melody or phrases.
Rootless voicings are the harmonic language of jazz piano when you’re playing with a rhythm section. If you want to see how these connect to a broader voicing system, work through Barry Harris voicings in parallel.
Reharmonising the Melody
- Reharmonise the melody with chords in the right hand — chord melody (shell voicing in the left, chords in the right).
- Play with drop 2 where your level allows.
- Use the melody notes as anchor points for movements and reharmonization.
- Record and evaluate.
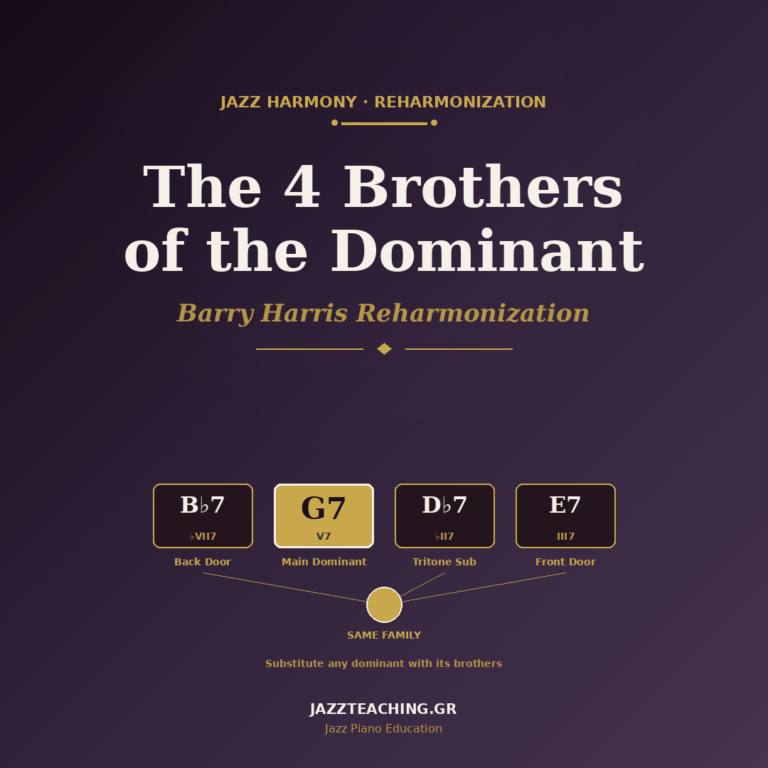
For a systematic approach to reharmonization, see Barry Harris reharmonization — Brothers, tritone, back door, and front door substitutions.
Improvisation — Preparation
Before you improvise, map out your harmonic material:
- Scale outline: write down which scales correspond to each chord — find common scales across the chord sequences.
- Practise:
- Arpeggios of chord tones
- Target notes
- II–V–I phrases
- Do call & response with yourself (right hand ↔ left hand).
Building Phrases
- Create your own phrases:
- Use related patterns as building blocks for phrase construction.
- Vary phrases rhythmically and structurally.
Transcription
The greatest “school” in jazz is listening to and copying the great players.
- Transcribe at least one phrase from a solo by a well-known pianist — e.g. Bill Evans, Red Garland, Hank Jones, Wynton Kelly, Tommy Flanagan, Bud Powell, Barry Harris.
- Play it with correct phrasing & articulation.
- Transform it into your own phrase somewhere else in the tune.
Comping & Interaction
- Play comping patterns appropriate to your level.
- Work through all the rhythmic variations you know and try rhythmic displacements.
- Work on sidestepping, movements, reharmonisation.
- Comp behind a recorded solo, or a friend.
- Record and evaluate.
Full Performance
Bring everything above together into a single, complete performance:
- Intro — e.g. rubato, vamp, pedal
- Head — the melody
- Solo — 1–2 choruses
- Comping — e.g. behind a backing
- Head out
- Ending — tag, ritardando, coda
Record and evaluate. The recording is the most honest teacher you have. Listen through the lens of Oscar Peterson’s 5 T’s — Touch, Technique, Taste, Tone, Time — as your self-assessment framework.
JAZZ PIANO NEWSLETTER
Weekly educational material, analyses, and practical exercises.
Sign up to receive exclusive jazz piano content — from theory to practical application.
SUBSCRIBE TO NEWSLETTER